Showing posts with label veggie friendly. Show all posts

Monday, December 20, 2010

Easy Entertaining with Trader Joe’s

As I mentioned in the previous post, my mother-in-law is an expert at using Trader Joe’s ingredients to make quick and flavorful meals. She says, “The joy of Trader Joe’s is that you can take their ingredients, be creative, and in 15 minutes have a dish cooking that is worthy of being served to company.” Her revised book concept is Dinner Party Dishes with Five Ingredients from Trader Joe’s

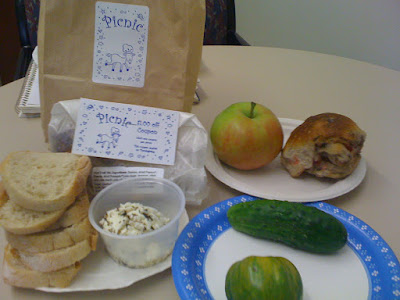
During our visit she had an opportunity to cook us one of her delicious creations. With a mix of fresh, canned, and prepared foods she put together a full meal with appetizers, salad, entree, vegetable side, and dessert. The meal preparation was quick and everything was ready in advance of our dinner guests’ arrival.

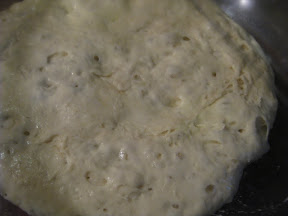
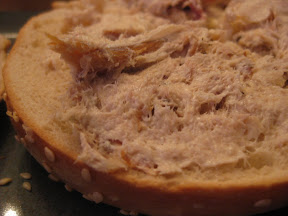
Our appetizers included assorted olives, hummus and whole wheat crackers, and a spinach pie. The spinach pie can be found in the freezer section. After baking in the oven, my mother-in-law cut the rectangular pie into small squares for serving. Inside the flaky pastry crust was a savory mixture of spinach, feta, and spices.

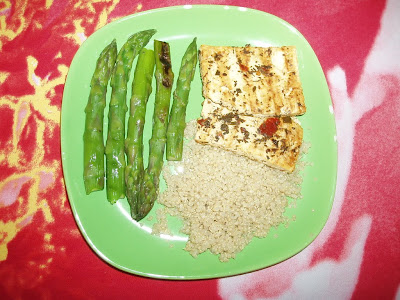
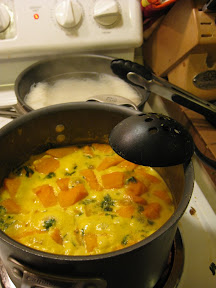
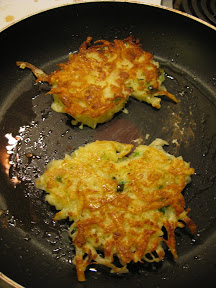
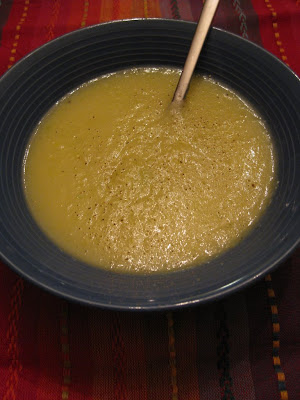
Main course on top and spinach pie on bottom.

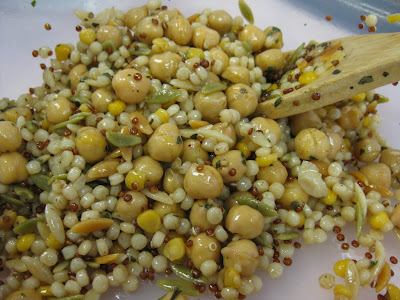
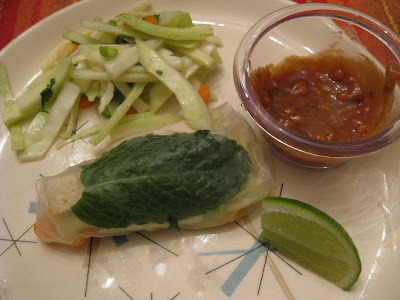
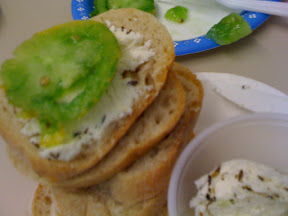
After finishing up with the appetizers we moved on to the main meal. First up, a mixed green salad chock full of cucumbers, tomatoes, mushrooms, red onions, garbanzo beans, and flavored mixed nuts (with herbs & spices). I contributed a quick salad dressing to top it off. She had picked up an assortment of infused olive oils during our trip to North Market along with a divided serving dish. We sampled four of the oils as part of the salad course. A crusty French baguette was the perfect dipper to try all of the oils.


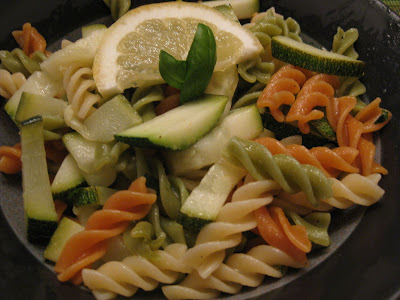
The meal was straight from the pages of her soon to be written cookbook! The ingredient that inspired this dish was frozen ravioli. My mother-in-law was thinking about a baked ravioli dish that she had growing up in New York. Using Trader Joe’s ingredients, some lemon olive oil we had picked up at North Market and a few things out of the fridge, she put together a layered baked ravioli dish that was hearty, flavorful, and quite impressive! The baked ravioli was full of vegetables, so a simple side dish was all that we needed. She steamed fresh green beans and tossed them in a little lemon olive oil with salt and pepper for the side.


We enjoyed a lively conversation while we devoured dinner. It was hard to stop eating, but we knew that we still had dessert on the way!

My mother-in-law has a go-to dessert that she uses when entertaining. It’s an elegant (and healthy) dish that requires just a little assembly. She fills an ice cream dish with a slice of fat-free pound cake, a dollop of fruit preserves, a generous amount of fresh berries, and tops it off with whipped cream. But no dinner party is complete without multiple desserts. We also enjoyed some rugelach and carrot cake.
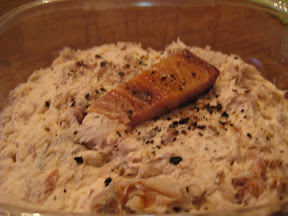
Sans whipped cream

This meal was quick to prepare, delicious to eat, and everyone was satisfied (and quite full) at the end of the night. The next time you’re stuck in a cooking rut or short on time and don’t know what to make, just head to Trader Joe’s to put together a great meal! And don’t forget to ask my mother-in-law for her recipe!

Baked Ravioli
2 packages Trader Joe’s frozen ravioli (any flavor, we used one package of asparagus and one package of sundried tomato)
1 jar Trader Joe’s bruschetta mix
1 jar crushed tomatoes
1 can artichokes
1 cup sliced mushrooms (leftover from the salad)
A few tablespoons of lemon olive oil
Shredded mozzarella cheese

Preheat oven to 350 degrees
In a large oval casserole dish, spread olive oil in the bottom (covering the entire dish)
Pour the jar of bruschetta in the dish and spread evenly
Place raviolis in a single layer on top of the bruschetta
Spread the artichokes on top of the raviolis
Top the artichokes with another layer of ravioli
Add the mushrooms next
Top with a third layer of ravioli
Spread the crushed tomatoes on top, covering all of the ravioli
Bake for 20-25 minutes until heated through
Sprinkle the shredded mozzarella on top and bake for another 5 minutes until the cheese is golden brown
Serve directly from the casserole dish


Summary:
Prep time: 10 minutes (opening jars & packages)
Cook time: 20-30 minutes
Casserole dish, serving utensils

Quick and Easy Salad Dressing
1/4 cup balsamic vinegar
2 tablespoons orange juice
3/4 cup olive oil
1 teaspoon dried basil
1/4 teaspoon garlic powder
Salt, pepper

Add all ingredients into a small salad dressing bottle or dish with a lid
Shake vigorously until well combined
Toss with salad

Easy & Healthy Dessert
Slices of fat free pound cake or angel food cake
Fresh blueberries, raspberries and strawberries, washed
Fruit preserves (cherry, strawberry, or raspberry
Whipped cream

Place a slice of cake in the bottom of a dessert dish
Add a spoonful of fruit preserves
Add a generous amount of berries
Top with a swirl of whipped cream

Friday, August 20, 2010

Summer Salad: Farmers Market Bounty

I love the farmers market! I know, I say it a lot but it is so fun to see what's fresh, meet the vendors, and just be outside in the summer.  When I saw that Olivia's Organics was calling for creative summer salad recipes, I knew exactly what I wanted to create. A Farmer's Market Bounty Salad.  The ingredients would be whatever looked interesting at the market.  For a base I used the Olivia's 50/50 blend.  It's half spinach and half spring mix.

I headed out for a lunchtime trip to the Copley Square Farmers Market.  Atlas Farms was my first stop, since I have my pre-paid share with them.  I picked up most of the ingredients, then wandered over to Siena Farm to see if they had any new-to-me produce.  These ingredients, combined with a few on hand from my weekend market visits, made for a good mix for the salad.

Atlas Farm
Rainbow Carrots
Yellow and Orange Tomato
Golden Beets
Flat leaf parsley

Siena Farm
Lemon Ball Cukes


Potager Farm/Herb Lyceum (SoWa Market)
Black Radishes

Also from the SoWa trip (can't remember the farm)
New England sweet corn

Whole Foods (not the market, but still seasonal!)
Fresh garbanzo beans


I had all the ingredients waiting in the refrigerator, but had no free nights for dinner!  So I did what any normal person would do (right?) and made my salad after coming home around 9:30 p.m.  I did a photo shoot with the completed salad and then packed it up for lunch the next day!

When I started thinking about a dressing for the salad, I kept coming back to something creamy.  It needed to be light that wouldn't hide the flavor of all of the vegetables.  I scoured the refrigerator and come up with Greek yogurt and lemon.  I added in some of the parsley and extra virgin olive oil for a quick and healthy dressing.

This was delicious, the Olivia's greens were a hearty base, and it was perfect for lunch and dinner for a few days!

Vegetable Prep


Slicing and dicing:
Carrots - peeled and cut into coins
Cucumbers
Tomatoes - cored first (I don't like all the seeds)


Peeled and Shredded:
Black radish
Golden beets (I also blanched these to help keep the color)


Blanched:
Fresh garbanzo beans
Shredded beets

Grilled:
We had grilled the corn earlier in the week and I used some leftovers

Salad Assembly
Place salad greens on a serving plate, top with veggies as neatly or sloppily as you'd like and serve!


Salad Dressing
1 container Chobani plain Greek yogurt
Juice from half a lemon
1 teaspoon (or so) extra virgin olive oil
Salt and pepper to taste

Whisk all ingredients together and serve with salad


Summary:
Cutting board, knife, y-peeler, slotted spoon, sauce pot, serving plates and utensils


Lunch the next day:

Saturday, July 17, 2010

Cooking American Food: Wild Rice Salad

American food was the assignment. The party theme was all-American food and music. My first instinct was to pick up one of my state-themed cookbooks (Missouri, Montana, and Ohio) and pick out an all-American side dish. But when you start reading the recipes, you realize that almost all of the recipes were inspired by non-American cuisine and include many use non-native ingredients. In community cookbooks like these, the recipes included have been passed down through families and most originated in another part of the world.

I closed up the books and starting thinking about what foods are native to this part of the world and what I could put together in a summery side dish to please a big crowd. Since the party was on a weeknight the salad had to be travel friendly (an hour to work and an hour to the party with no refrigeration). And since I didn't know all of the guests I ruled out my favorite herb, cilantro and nuts in case of allergies.

After some thinking I came up with two ingredients - wild rice and cranberries. Wild rice is native to North America - it grows in the Great Lakes region. Cranberries are a product of Massachusetts, so they were an easy choice to throw in.

I perused the cookbook library and really couldn't find a good recipe for what I was looking to make. So I used my American can-do attitude and made up my own recipe!

My weekly trip to the farmers' market yielded a vibrant green bunch of flat-leaf parsley and purple scallions. A quick trip to the grocery store provided the rest of the ingredients - wild rice and celery. Thanks to some delicious free samples, provided to me by Oh!Nuts, I had a bag of dried cranberries in the pantry. The dressing for the salad was made out of ingredients from the fridge and the pantry. As a bonus - this is a very healthy dish! The only fat comes from the oil in the dressing and all the ingredients bring something nutritious to the mix.

The salad was pretty quick to make - while the rice is cooking you can finish all of the other components. It held up well during travel and was a big hit! I lightly dressed the salad the the before the party and put out extra dressing for guests if they wanted more flavor. I will be making this again soon! The wild rice is a great base for a variety ingredients - much like quinoa, barley, or kasha. Perfect for summer lunches and potlucks!

For a recap of all the American inspired dishes and songs, visit the gracious party host's blog Doves and Figs. I forgot to take a picture of the finished product - you'll have to visit Doves and Figs to see the completed salad. Great company, food, drinks, and song!

Summer Wild Rice Salad
Serves 10+ as a side dish

Rice Salad
2 8-ounce bags Quick-cooking Wild Rice (Lundberg Family Farms brand)
1.5 cups celery stalks, washed and diced
1.5 cups dried cranberries
1 cup flat leaf parsley, roughly chopped
3-4 scallions, purple (or white) and green parts chopped

Dressing
1/2 cup balsamic vinegar
2 tablespoons honey
1 tablespoon Dijon mustard
Zest from 1 orange
Juice from one orange
1/2 cup extra virgin olive oil

Cook rice according to the package instructions
Remove from the pot when finished and let cool completely
Toss veggies, herbs, and cranberries with the rice (I think using your hands mixes it best)

In a food processor, combine vinegar, honey, mustard, orange zest and juice
Blend, streaming in olive oil until well mixed and frothy

Pour about half the dressing over the rice mixture and toss well
Refrigerate overnight, or until ready to serve
Toss with additional dressing if desired
Garnish with fresh parsley leaves and enjoy!

Summary:
Prep Time: 10-15 minutes
Cook Time: 30-40 minutes (rice)
Pot for rice, spoons, cutting board, knife, measuring cups, food processor, serving bowl and utensils

Sunday, June 13, 2010

Daring Cooks Challenge: Pate and Freshly Baked Bread

Our hostesses this month, Evelyne of Cheap Ethnic Eatz, and Valerie of a The Chocolate Bunny, chose delicious pate with freshly baked bread as their June Daring Cook’s challenge! They’ve provided us with 4 different pate recipes to choose from and are allowing us to go wild with our homemade bread choice.

When I first saw this month's challenge, I wasn't quite sure what to think. When I think of pate, I think of liver, and that is not very appetizing to me. I think about my grandfather ordering steaming plates of liver and onions and happy hour at my other grandparent's club where the star dish was chopped liver. Needless to say, I was very happy to see the vegetarian choice on the recipe list! I have also been trying to bake more breads at home and this was a perfect opportunity to try out a new recipe.

I used this recipe for the pate: http://www.epicurious.com/recipes/food/views/Tricolor-Vegetable-Pate-2538 and this recipe for the baguette http://www.kingarthurflour.com/recipes/baguettes-recipe
(great step by step guide here). I started both recipes on Saturday afternoon and finished them up on Sunday. Right now I'm enjoying the results while I flip between the Tony's, the Celtics, and blogging.

I assembled all the ingredients for each layer, prepped my new red loaf pan, and got to work. For the bean layer I opted for fresh oregano. Oregano is not really one of my favorite flavors and I especially do not like dried oregano. I also mashed and blended by hand - in the past when I've used the food processor the mixture has become too liquidy.


Not too much too report on the red pepper layer - just dump and pulse! For the pesto, it was also pretty straightforward. I toasted the pine nuts in the toaster on the light toast setting. All the ingredients went into the quickly washed food processor and pulsed and processed until I had a pesto.


As a creative touch, I decided to put a lemon slice and some oregano leaves in the bottom of the loaf pan for decoration. After making sure the layers were even and the loaf was tightly wrapped with plastic wrap, the loaf went into the refrigerator to chill overnight. Twenty-four hours of chilling later and 30 minutes in the freezer later, the loaf was ready to unmold. Now on to the baguette before I finish the story of the pate.

I started the baguette before working on the pate. Mixing up the starter was easy - though it did call for one of the only kitchen utensils I don't have (1/16 teaspoon measuring spoon). I whisked together the yeast, water, and flour and left it on the counter to work its magic while I headed out to a sorority alumni event.


When I woke up this morning I was happy to see that my starter looked like the starter in the King Arthur Flour baking blog. After a quick breakfast with farm fresh eggs from Smith's Country Cheese and uber wheat toast from B&R Artisan Breads, I started on the next steps for the baguettes.

I dumped the starter, salt, and flour into my trusty red KitchenAid mixer bowl and whisked the yeast and water in the empty starter bowl. Then it was all in to the mixer for 5 minutes of kneading.

Now the waiting. I planned to be home all day so I could check on my dough almost hourly. Here's a few looks at the bread during the 5ish hour rising process. Having no AC and warmish day was helpful to the dough during the process. After rising, gently deflating, rising, gently deflating, dividing, flattening, folding, and more rising the baguettes were ready for the oven!


I followed the tip to spritz the dough with warm water to create a crispy crackly crust. After 25 minutes the baguettes were golden brown, crispy and maybe just a little too dark on the bottom (almost, but not quite burned).


Now the fun part - putting it all together! I took the loaf out of the freezer and decided on using my cake stand for a dramatic presentation. I sliced up one of the baguettes and flipped the pate. Success! It stood up on the plate (don't mind my off-center decoration)!


Now for the review.... The flavors are great. Although as I sit here snacking, it does taste much better at room temperature (as opposed to ice cold right out of the mold). I also thought that the bean layer was way too big relative to the other two layers. I think next time I would put a smaller layer of beans on the top, then the pepper and pesto, and beans on the bottom. That would also give it a more stable base.


The baguettes are fabulous! We have already polished off one of the three and the others aren't going to be around for long. Even though it was a 24+ hour recipe, it was worth it! Thanks to the Daring Kitchen ladies for picking such a fun challenge!

Thursday, May 27, 2010

Beth from Denver: Scrumptious Simplicity

Another installment from Beth from Denver! Beth cooks up delicious and easy vegetarian meals. Enjoy!

I’m not allowed to have a grill at my condo complex, so I have recently invested in a George Forman Grill. It doesn’t feel the same as grilling on the patio, but it is easy to use, easy to clean and does a great job! When I wanted something simple and healthy a few nights ago, I decided to set up George to grill some tofu and asparagus. I completed the meal with some quinoa.


Grilled Tofu, Asparagus and Quinoa
1 bunch of asparagus
1 package of extra firm tofu
3 teaspoons Target brand South American Style Grilling Paste (or any preferred seasoning)
1 cup quinoa

Open and drain the tofu
Place in a strainer in the sink with a saucepan on top in order to squeeze out as much water as possible
Preheat the grill to medium-high
Cut the ends off the asparagus and then cut the stalks in half
Grill for about 5 minutes, rotating halfway through (unless you are using a George Forman with a grilling plate on top
While the asparagus is cooking, combine the cup of quinoa with 1 cup of water in a saucepan and bring to a boil
Reduce to a simmer, cover and cook until water has been absorbed (10-15 minutes)
Cut the tofu into half inch slices
Spread the grilling paste on both sides of tofu slices before placing on grill
Cook for about 10 minutes (depending on how firm you like the tofu), making sure to flip in order to cook both sides

Enjoy your simple and healthy meal!

Friday, April 9, 2010

Potluck in your plans? Head to the Pantry!

Tis the season for potlucks, picnics, and friendly spring get-togethers. Now that New England has thawed from winter, people are leaving the house again! If you find yourself invited to a potluck and have no idea what to make, here's an easy solution.

I had a Sunday afternoon lunch potluck on my calendar and knew exactly what dish I wanted to bring along. When I went the pantry to get the ingredients to make the pasta salad, turns out I had no pasta! No elbows, linguine, penne, nothing! Instead of running to the store I decided to get creative and work with what I had on hand.

With a few minutes and a few pantry staples I was able to pull together a tasty dish to bring along to a discerning group of diners - my sorority alumnae group (yay Gamma Phi Beta!). The dish had to be tasty, somewhat healthy, and good for sitting out for a little while. The dish got great feedback and I promised I would post the recipe on the blog. Without further delay, here is the recipe:

Quick and Easy Harvest Grain Salad


1 bag of Harvest Grains Blend from Trader Joe's (it has Israeli couscous, red and green orzo, split dried garbanzo beans, and red quinoa - it's in the rice aisle)
1 can of no salt added garbanzo beans, rinsed and drained
About 1/4 cup olive oil
2-3 tablespoons balsamic vinegar
Salt & Pepper
Dried or fresh herb blend (I used a premade mix with parsley, oregano, and basil)
Cook harvest grains according to the directions on the box
When done, immediately take out of the pot and put into a large serving bowl (or storage bowl) and fluff with a fork to separate the grains
Add the garbanzo beans, herbs (maybe 1-2 teaspoons) to the cous cous and mix with a spoon or spatula
Add about half the oil and vinegar
Mix well
Taste and add more herbs, oil/vinegar, and salt and pepper as needed
Chill and serve!

Summary:
Prep time: 5 minutes
Cook time: 15-20 minutes
Soup pot, fork, spoon, colander, measuring cups, serving bowl, serving spoon

Tuesday, March 16, 2010

Guest Post: Vegetarian Delight by Beth

Since I've been away on vacation I'm a little behind in my cooking and blog posts. Instead, I'd like to introduce a new guest blogger - my best friend Beth! She's been a vegetarian for a long time and will hopefully add some tasty vegetarian recipes to the Good Cook Doris recipe box! Enjoy!

Here's one of our many photos involving food (yes, mashed potato martinis):


From Beth:

While I enjoy cooking, complicated recipes intimidate me. I am easily overwhelmed by multiple steps and long lists of ingredients - especially when I haven't heard of all of them. I can proudly say that in my many years of vegetarianism, my repertoire has recently greatly expanded.

Good Cook Doris must take some credit for my new found confidence in the kitchen as it has helped to teach me, guide me and, above all, inspire me. Thanks Lara! Here is a vegetarian sloppy joe recipe, adapted from a Rachel Ray cookbook, that I made it a few days ago to be enjoyed by omnivores and carnivores alike.

Beth's Veggie Sloppy Joe

1 tablespoon vegetable oil
2 jalapeno peppers, seeds and ribs removed (unless you like it super spicy)
1 red, green or yellow bell pepper
1/2 large red onion
1 can black beans
1 15-oz can diced fire-roasted tomatoes
1 teaspoon ground cumin
1 teaspoon ground coriander
1 rounded tablespoon brown sugar
1 tablespoon Worcestershire sauce (or vinegar if don't want to include anchovies)
4 crusty rolls

Seed and chop the jalapeno peppers and bell pepper
Chop the red onion
After heating oil in a skillet over medium-high heat, add the chopped jalapenos, bell pepper and onion
Cook until tender (it took about 8 minutes on my stove)
Add the black beans (drained), cumin and coriander to the skillet
Season to taste with salt and pepper
Stir in the tomatoes, brown sugar and Worcestershire sauce
Allow mixture to simmer for a few minutes before serving on toasted rolls

I added a slice of sharp cheddar cheese and a pickle before serving. The leftovers are easy to reheat and taste great too.


Tuesday, January 12, 2010

A Trip to Southeast Asia

I've been looking at cooking classes for the past 6 months and trying to figure out what type of class I want to take. One of the classes I was considering taught recipes and techniques from a cookbook called Hot, Sour, Salty, Sweet by Jeffrey Alford and Naomi Duguid. I wasn't quite sure what it was going to be about and I decided to think about it before signing up. After a few days I completely forgot about it as I got busy with other things.

When I was at the library looking for a good book to read on my holiday travels, I came across a copy of Hot, Sour, Salty, Sweet! I checked it out and started reading. What a wonderful cookbook - stories about Southeast Asia, its people, and the food. I have already read through the book two or three times! Sadly the cooking class is sold out, so I started teaching myself the recipes. One of the first recipes to catch my attention was the Silky Coconut-Pumpkin Soup. The recipe is from Thailand and Laos. I've had a red kuri squash sitting on the counter for a while, and decided this would be a good substitution for the pumpkin. The soup was as advertised, silky-smooth and delicious. It was wonderful as lunch the next day.

As a side dish I tried something that I've eaten a lot but never tried to make at home - Vietnamese Fresh Rolls with peanut sauce. For a healthy, vegetarian version I cooked up some tofu and filled them with a pickled cabbage and carrot slaw. I made vermicelli (rice noodles) to add in, but the rice paper wrappers weren't big enough to fit everything in (actually, I forgot until I got to the last roll....).

This was delicious and would make a great party dish after I work on my rice paper rolling skills. The soup is going to be repated often too!

Silky Coconut-Pumpkin Soup
Adapted from Hot, Sour, Salty, Sweet
Makes 4 servings

Printable Recipe

3 Shallots, unpeeled
1 red kuri squash, approximately 1.25 pounds unpeeled
1 can light coconut milk (approximately 2 cups)
2 cups low-sodium chicken broth
1 cup loosely packed cilantro leaves (the recipe called for coriander)
1/2 teaspoon salt
2 tablespoons Thai fish sauce
Freshly ground black pepper
1 scallion, cut into thin rings

In a small non-stick skillet over high medium-high heat, dry-roast the shallots, turning occaisionally, until blackened and soft
Peel the the shallots, cut in half lengthwise, and set aside
Peel the squash and remove seeds and guts
Cut into 1/2 inch cubes
Place the coconut milk, broth, squash cubes, shallots and cilantro in a large pot and bring to a boil
Reduce to low, add salt, and simmer for 12-15 minutes until the squash is tender
Stir in the fish sauce and cook for 2-3 more minutes
With an immersion blender (or food processor), blend the soup until it is a smooth consistency
Ladle into individual bowls, garnish with scallions and freshly ground pepper

Vietnamese Fresh Rolls
Makes 5 rolls, with a little extra slaw and tofu
1/2 block of extra firm tofu (make sure it is well-drained)
1/4 of a head of green cabbage, cut into thin strips
1/2 cup chopped cilantro leaves
1/4 cup shredded carrots
1 scallion, chopped
Rice wine vinegar ( a few good splashes)
Sesame oil (one small dash)
Salt
5 Mint leaves
Rice paper wrappers

Note: You'll need to assemble all your ingredients before you work with the rice paper wrappers

Reheat a the same non-stick skillet (from the shallots) over medium heat
Cut the tofu into 1/4 inch sticks
Add to the skillet and cook about a minute or so on each side, until just golden brown
Set aside until assembly


Mix chopped cabbage, carrot, cilantro, and scallion in a bowl. Pour on a few splashes of rice wine vingar (enough to coat everything), one drop of sesame oil and sprinkle with salt
Mix well and set aside until assembly

Set up your assembly line for ingredients - Slaw, tofu, and mint leaves

Microwave a large bowl of water to soften the rice paper wrappers
Take 1 wrapper, dip into the water to soften, and then place on a plate
Put the mint leaf in the middle
Top with 2-3 sticks of tofu
Top with the slaw
Roll the rice paper wrapper like a burrito, tuck in two sides, then roll to close
Repeat for each wrapper

Summary:
Total prep time (prep the rolls while the soup is cooking): 25-30 minutes, depending on how fast you can peel a squash
Total cook time: 20 minutes
Small non-stick skillet, sharp knife and cutting board, ladle, soup pot, microwaveable bowl, serving dishes and utensils

Serve with your favorite peanut sauce. I made some quick sauce, but it isn't worth reporting on. I'll have to work on a good recipe to share.

Serve with the soup and enjoy! This made for a great lunch the next day. We had the noodles topped with tofu, slaw and the peanut sauce.


Monday, January 4, 2010

A little overdue...Latkes!

Now that you've passed Chanukah and the rest of the holiday season, you might be able to think about eating latkes again. Or, if you are like my regular reader Tim, you've been waiting for this write-up since 12/21 when it was mentioned it in the previous post. Here you go Tim!

This year I was swamped with homework and a busy schedule around the holidays. Usually I like to try out new latke recipes, but this year I was luck to find time to grate the potatoes. I picked up some sweet potatoes, russet potatoes, onions, scallions, and pulled out the mandolin. Grating potatoes is a labor of love and the results are always delicious. Don't forget to squeeze out the excess moisture before mixing! Thanks to a tip from my brother, I used just a little olive oil in the pan instead of a few inches of vegetable oil. The result was a crunchy and somewhat healthier latke.

An important note is that if you grate your white potatoes too early, they will turn gray and your latkes won't be very pretty. I don't know all the food science, but this can be slowed by grating your onions into the bowl first and then tossing the shredded potatoes with the onion juice.


We enjoyed these with the pot roast for dinner. As a special treat, we also had them for Chanukah breakfast with poached eggs on top. A 'kosher eggs benedict'! I haven't mastered a Hollandaise sauce yet (or even tried), but that would definitely finish this off nicely. Of course we had leftover cheddar scallion biscuits on the side too because you can never have too many carbs.


Happy latke eating! Perfect for Chanukah or anytime of the year! I'll do my best to write up my recipe - I did these from memory - so tweak as you see fit! The cooking instructions are the same for both

Potato Latkes

Traditional Latkes
1 russet potato, peeled
1 egg, lightly beaten
1/4 - 1/2 of a yellow onion
1 scallion, chopped into small pieces (add to taste)
1 tablespoon-ish flour
Salt and Pepper

Sweet Potato Latkes
1 sweet potato, peeled
1 egg, lightly beaten
1 scallion, chopped into small pieces (add to taste)
1 tablespoon-ish flour
1/2 teaspoon ground nutmeg
Salt and Pepper

Olive oil for frying

For each respective potato, follow these instructions
Using a mandolin or box grater, grate the potato into a large bowl
Using a colander, cheese cloth, or just your hands, squeeze out the excess moisture and return the potato to the bowl
Add the onion, and any seasonings and toss
Add a small amount of egg (about half the beaten egg) and about a tablespoon of flour, mix until the flour and egg are evenly distributed
If the mixture seems really wet, add a little more flour

Cooking for both
Place a wire baking rack over a baking sheet in your oven and heat to 200 degrees
Heat about 2 tablespoons of olive oil in a medium skillet over medium-high heat
When a small piece of shredded potato sizzles in the oil, its ready!
Using a 1/4 cup measuring cup, add the latkes into the pan in batches
Cook for 2-3 minutes per side (until golden brown)
If they are browning too quickly, reduce the heat slightly
Place the cooked latkes in the heated oven while you finish frying all the latkes
Serve warm

For leftover latkes, let them cook completely
If you plan to eat them the next day, wrap them tightly in foil and refrigerate
If you plan to keep them longer than a day or two, place them on a baking sheet and put them in the freezer
When they are frozen, wrap them in plastic wrap and then foil (to prevent freezer burn)
Either way, reheat in a 350 degree oven before serving

Serve with chunky applesauce, sour cream, or horseradish!

Thursday, November 12, 2009

Farmer's Market Finds: Simple Potato Leek Soup

While my squash pie was baking away in the oven, I took my other farmer's market finds and whipped them up into a simple and delicious soup. The change of the seasons means new veggies to buy at the market. Inspired by Mike I.'s apparent poor cooking of leeks on Top Chef, I decided to pick some up and give them a try. I think I have succeeded in buying a new to me veggie or fruit each week at the market this season!


When I cut them open, I loved the way the layers looked. I also picked up some potatoes and decided to make a potato leek soup. Lately we've been trying to cook dairy-free (well, lactose-free) here at the Good Cook Doris kitchen. This soup was delicious and creamy with only seven ingredients! You won't even miss the cream.

Simple Potato Leek Soup
2 leeks, cleaned and cut into 1 inch pieces
About 2 lbs. potatoes, peeled and cut into half inch pieces
2 tablespoons unsalted butter
2 cups of water
1 14-oz. can of low-sodium chicken broth
Salt and pepper
Dash of poultry seasoning (marjoram, sage, thyme)

Melt the butter in a medium soup pot over low heat
Add leeks, cover and cook until soft, about 10 minutes, making sure not to brown the leeks
Add water, broth, and potatoes
Simmer for about 20 minutes, until potatoes are fork-tender
Puree with an immersion blender (or food processor)
Season with poultry seasoning, salt, and pepper

Summary:
Prep time: 10 minutes
Cook time: 30 minutes
Cutting board, knife, soup pot, immersion blender, serving bowl and ladle


Monday, August 17, 2009

Summer Zucchini with a story

It's that time of summer where freshly picked zucchini is everywhere - here in Boston is no different. My coworker and her husband are not big fans of vegetables and she offered me a few zucchinis from her neighbor's garden. I couldn't imagine them going to waste, so I accepted!

The real story here is that my hubby and our friends Aaron and Amanda used to live in the same house that my coworker now lives in. Amanda built and planted a nice veggie garden out back so she could eat sustainably. So in fact, this zucchini came by way of Amanda (just 6+ years later). Thanks Amanda!

I wanted to make zucchini bread, but a quick scan of the fridge didn't show too many ingredients. I googled a recipe for zucchini bread + 1 egg (the ceaseless wonders of search engines) and went with the first recipe that popped up - Lemon Zucchini Bread. One thing I've learned is to check out the reviews with recipes. I followed the tip to add in some vanilla to the batter. It turned out great and we ate it all!


After the bread, I still had another zucchini left. We were getting to head out of town for wedding #3 of the season and wanted to use it up before we went. I cut it up and pondered something quick and easy to make. With the hot summer temperatures I wanted something that didn't completely heat up the house.


I sauteed the zucchini with some olive oil and salt and added it to some tri-color rotini. In the spirit of grow-your-own food, I added some fresh basil from our plant and kept it simple with olive oil and lemon juice. The hubby topped his with grated Parmesan and proceeded to clean his bowl - the sign of a tasty dinner.

Sunday, August 2, 2009

Farmer's Market Finds

I've been on vacation for a few of the past Fridays and have missed my weekly trip to the Copley Farmer's Market. Here's a recap of some of the recent finds that I did have (and didn't have time to post).

First up, smoked bluefish spread from the guys at Nantucket Wild Gourmet & Smokehouse. This was delicious - better than those cream cheese-y spreads out there. It was great served on a warm toasted bagel.


Next up, my regular lunch the Goat Cheese picnic. Sometimes I feel like a little something extra to go with the tasty cheese and fresh bread. It was raining at the market this day, so my favorite vendor for dessert wasn't there (they pack up at the first drop of rain). So I opted for a healthier addition. I picked up a green heirloom tomato and fresh cucumber to make little sandwiches. For dessert I got a cranberry orange roll from Iggy's. This is a very wallet friendly lunch:

$5 (with $1 off coupon) - Goat Cheese Picnic
$.50 - Fresh cucumber
$.50 - Heirloom tomato
$.90 - One of the first apples of the season
$.75 - cranberry pecan roll
Total for Farmer's Market Lunch: $7.65

A great way to support local farmers and get a delicious deal.


Here's a look at the inside of the tomato.

LinkWithin

Related Posts with Thumbnails