Showing posts with label beef. Show all posts

Sunday, May 24, 2020

Seasonally Delicious Burger Night


Grilling season is year round at the Good Cook Doris house - you'll find me out in the snow womaning the grill. But now that the weather is finally warm the grill is really in full swing. Spring produce is also finally coming up and it seemd like the perfect combination for celebrating burger month 2020.

This epic burger is part of a fan-frickin-tastic month-long event hosted by Girl Carnivore, but opinions are always my own!

This is less of a burger recipe and more of a burger guide. It takes advantage of seasonal local ingredients and a little bit of creativity! This year we joined a spring CSA that delivers a mix of winter storage crops, early spring crops, and pantry items from local food producers.


It's been a delightful assortment of products. Most exciting are the early spring crops that are new to me - like wild ramps and sunchokes. Each box also comes with a loaf of freshly baked crusty bread. With all of these ingredients to work with I got grilling! I think that the fun part of burger meals is that everyone can customize their burger however they like. The griller's job is to make a good assortment of toppings along with juicy patties and the eaters are in charge of their creations. 

Here's how I assembled my mid-May seasonally inspired burger! 

Ingredients:
Ground beef from a local farm that is now offering home deliveries (I prefer 80/20 or 85/15 ground beef - I find it stays nice and juicy)
Fresh crusty bread from a local bakery
Cabot extra sharp cheddar
Ramps
Local sriracha
Dukes Mayo (my favorite!)

Preparation:
Burger patties: 
Keep it simple and let the beef shine! I like to season generously with kosher salt and ground black pepper when I mix the meat. 
Gently form into patties, being sure to press down and make an indent in the center (helps it from puffing up when grilling).

Toppings:
Choose your toppings! 
I like to cut thick slices of Cabot cheddar to melt on top - the sharper the better
For vegetable toppings, coat in oil and sprinkle with kosher salt

Grilling:
Start the burgers first
Add thicker vegetables with the burgers, add more delicate vegetables when you flip the burgers
Add the cheese when the burgers are almost done, letting it melt into a delicious coating on top
Grill your bread if you want to add a little extra grill flavor


Assembling:
Spread mayo on both sides of the bread and drizzle sriracha to your desired level of spiciness
On the bottom bread, add the grilled veggies
Add the cheese covered burger and top with the second piece of bread
Serve with a side of pickles, simple salad, or some grilled sweet potatoes
Try to fit it all in your mouth! Watch out for the dripping juice!


Now it's your turn! Open the fridge and pantry and see what you've got in there and get yourself to the grill! To help you out, be sure to enter the Burger Month giveaway to win some awesome prizes. They'll help you take your grilling to the next level! 


Want more amazing burger ideas? Check out these bloggers for more burger month creations:
🍔 Girl Carnivore 🍔 A Kitchen Hoor's Adventures 🍔A Day in the Life on the Farm 🍔 A Merry Recipe 🍔 An Affair from the Heart 🍔Art of Natural Living 🍔 Caroline's Cooking 🍔Chef Justin Grimm 🍔Chiles and Smoke 🍔 City Living Boston 🍔Comfortably Domestic 🍔Culinary Adventures with Camilla 🍔 Dixie Chik Cooks 🍔 Everyday Eileen 🍔 Everyday Southwest 🍔 For the Love of Food 🍔Good Cook Doris 🍔Grillax: Fire. Food. Fun. 🍔 Grilling Montana 🍔 Hezzi-D's Books and Cooks 🍔 Jolene's Recipe Journal 🍔 Karen's Kitchen Stories 🍔 Kate's Recipe Box 🍔Kudos Kitchen by Renee 🍔Life Currents 🍔 Life of a Ginger 🍔Making Miracles 🍔Man Meat BBQ 🍔 Miss in the KItchen 🍔Off the Eaten Path 🍔Our Good Life 🍔 Palatable Pastime 🍔 Pastry Chef Online 🍔 Real Life With Dad 🍔Renee Nicole's Kitchen - Everyday Gourmet 🍔 Sarah's Cucina Bella 🍔Savoring Midlife 🍔 Seduction in the Kitchen 🍔 Simple and Savory 🍔 Spoonabilities 🍔 Sumptuous Spoonfuls 🍔 Swirls of Flavor 🍔 The Redhead Baker 🍔 The Spiffy Cookie 🍔This is How I Cook 🍔 Thyme for Cocktails 🍔What's Cooking Italian Style Cuisine 🍔 Wildflour's Cottage Kitchen 🍔Wile E. BBQ 🍔 Wok & Skillet 🍔


Disclaimer: Thank you to #BurgerMonth Sponsors: Cabot, Anvil & Hammer, New York Beef Council, Red Duck Foods, and Spoonabilities for providing prizes for this epic event. All opinions are my own. The #BurgerMonth giveaway is open to U.S. residents, age 18 & up. All winning entries are verified. By entering you give the right to use your name and likeness.


The number of entries received determines the odds of winning. One winner for each weekly giveaway will be selected. The prize packages are sent directly from the sponsors. Winners have 48 hours to respond or they forfeit the prize and another winner(s) will be chosen.

The #BurgerMonth Bloggers are not responsible for the fulfillment or delivery of the prize packages. No purchase necessary. Void where prohibited by law. This promotion is in no way sponsored, endorsed or administered by, or associated with Facebook, Instagram, Pinterest, Twitter or any other social channel mentioned in the #BurgerMonth posts or entry.

Saturday, April 2, 2016

First Annual Brisket Cook-off

Ask me my favorite thing to cook and I always say brisket. You might think that sounds a little boring, but brisket lends itself to endless variations. Whether it is braised or smoked the flavor possibilities are numerous. But now the golden brisket award and bragging rights are at stake in the First Annual Brisket Cook-off at temple. My friend Jenni Logan and I teamed up to enter and decided her mom's recipe was our best shot at winning. For this type of event we thought traditional was the right way to go. We're not going for a trendy or 'out there' recipe, but rather something tried and true that will bring back great memories from the tasters.

Jenni and I "met" in the Boston University Masters in Gastronomy program a few years ago. I say "met" because it turns out that way back in high school our paths crossed in the Midwest. We even found pictures with us together at the same summer camp events! Since then we've shared a love of cheese, cooking, and plenty of homework! 
 
We bring you Jenni's family recipe for brisket and hope that you enjoy as much as they do! It is a sweet and sour style recipe that produces melt in your mouth slices. Stay tuned for the cook-off results! Want to see more pictures and know results sooner? Follow along on Instagram


Mom's Yummy Brisket
1 (3-4 pound) brisket (7 pounds for 10-12 people - double entire recipe)
14 ounces Heinz ketchup
2 large white onions (thinly sliced)
1 lemon (juiced)
1 teaspoon mustard
2 squirts Lea and Perrin's Worcestershire sauce
1 heaping teaspoon brown sugar
1/2 cup water (adjust to consistency of a medium sauce)
Lawry's salt, black pepper
Garlic powder

1 9"x13" roasting pan
Pam non-stick cooking spray
Aluminum foil to cover and seal meat

Take roasting pan and Pam it. In a large mixing bowl, mix ketchup, lemon juice, mustard, Worcestershire, brown sugar, and water (you want a medium thickness (not to thin or thick!)). Put a small amount of sauce in the bottom of the pan. 

The brisket should have some fat on the top but not too much. Put Lawry's salt, pepper, and garlic powder on the brisket, season well. Place brisket in the pan. Cover the brisket pretty well with the sauce (you may have to add a little additional water). Add the sliced onions on the top of the brisket. Cover and seal the pan with the foil. 


Bake for at least 3 hours at 350 degrees or until very tender (fork should twist easily in the meat). Cool and slice (I use an electric knife). Be SURE to slice the meat against the grain. Return the meat to the pan, re-cover with the onions and sauce and re-foil. You can either freeze it our keep it in the refrigerator until you reheat and serve. Reheat the sliced brisket in the sauce at 350 degrees.


*Notes*
We used an 8 pound brisket (weighed before trimming fat). We cut into two pieces for ease of cooking.
The type of ketchup is a consideration! Heinz ketchup does have a distinct flavor. If you use another brand (like an organic ketchup), you can adjust the sweetness level with the amount of brown sugar you add.
We found that after slicing the meat needed to be heated fully through and cooked for about 45 minutes - 1 hour to become as tender as we wanted.
You could cook this in a crockpot on low for 4-6 hours, checking at 4 hours on the tenderness.
If you make this for Passover, check your sauce ingredients to be sure they are kosher for Passover.

If you are looking for even more brisket ideas, try these:
New England Maple Coffee Brisket (about halfway down the post)
Smoked Brisket
Smoked Brisket, Version 2
Passover Brisket (with Manishevitz!)
Fun ways to use leftover brisket: Beef and Biscuit Pie
Slow Cooker Brisket

Here are a few shots of the competition! We had a lovely spring snowstorm to start our day - perfect brisket weather. While we didn't win we did have a blast (pretending we were in a Top Chef style competition!). We'll be back next year for another great time.


Wednesday, February 20, 2013

What’s Cooking in the Kitchen?


My cooking routine has definitely changed since adding a new little one to the household and going back to work full-time and graduate school part-time. Now that we have a little eater, meals have to be quick to prepare and appealing to both adults and kid!

Pre-baby, we rarely ate out on weeknights. I cooked 3-4 nights a week, often trying out new recipes and techniques. Sometimes dinner wasn’t ready until 7:30 or 8:00 pm but we didn’t mind. With a little one, our weeknight schedule doesn’t allow for a lot of heavy duty cooking and we don’t want to do take-out. So over the past year I’ve slowly adjusted the routine, bringing us to our current schedule:

Thursday or Friday night: Menu planning and grocery list writing.
Saturday or Sunday morning (around 8 am): Grocery shopping.
Saturday morning (10 or 11 am): Weekly family trip to the farmers market to stock up on produce and our favorite bagels, meats, cheeses, and every so often a nice bottle of wine.
Sunday afternoon: Prep for the week! Wash, chop, cook, organize.
Weeknights: Assemble, reheat and eat! Make lunches and get organized for breakfast.

I try to cook everything we need for the week on Sunday and leave only a few things to cook during the week. If I cook during the week, it is usually something that goes in after the little guy’s bedtime. Here is a look at what we’ve had cooking recently! I’m sorry I have limited pictures – these days it’s more about getting dinner on the table for these guys.


Pot Roast in Many Ways
I cook for the week, but sometimes it can get a little boring to eat the same meal over and over again. Instead of the creativity of cooking something new each night I am having fun making variations with the original dish. This pot roast kept us well fed for many nights.

Pot Roast Take #1: Slow Cooker Top Round Roast with Vegetables
3ish pounds Top Round Roast – From Charlton Orchards (Wayland Winter Farmers Market)
16 oz sliced mushrooms
3-4 carrots, peeled and cut into 4 inch pieces (basically cutting in half)
About 10 small roasting potatoes (I used a mix of red, purple and Yukon gold)
1 medium yellow onion, quartered
1-1.5 cups water + beef base or beef broth/stock
Bay leaf
Splash of red wine
Salt

Salt the pot roast
Brown the pot roast on each side, for extra flavor (I skipped the step this time)
Add pot roast to the slow cooker and arrange vegetables around the sides of the pot roast
Add broth, wine, and bay leaf
Cover and cook on low for 4-6 hours (check after 4 hours to see how tender the meat is)
Remove bay leaf and serve


Pot Roast Take #2: Pot Roast Quesadillas with Sharp Cheddar
Flour tortillas
Shredded extra sharp cheddar cheese (I use Cabot Extra Sharp or Seriously Sharp)
Leftover pot roast, carrots, and onions – chopped

Preheat the oven to 350 degrees
Layout tortillas on a foil-lined baking sheet
Spread a thin layer of cheese on half of the tortilla
Top with chopped pot roast and vegetables
Sprinkle another thin layer of cheese on top of pot roast
Fold tortilla over
Bake for 5-8 minutes, until cheese is melted and tortilla is a lightly golden
Cut into wedges and serve


Pot Roast Take #3: Pot Roast Hash with Root Vegetables
Leftover pot roast, carrots, onions, and potatoes - chopped
Leftover roasted sweet potatoes and beets
Vegetable oil

Heat oil in a large skillet over medium-high heat
Add chopped pot roast and vegetables in a single layer
Cook for 5 minutes, stirring, until heated through
Press down with the back of a spatula and continue cooking for 5-10 minutes until the bottom is nice and crispy
Serve with a fried or poached egg on top – and a few splashes of your favorite hot sauce!

We served ours with scrambled eggs - I wanted to make sure the eggs were cooked through for the little guy.


What is your favorite way to repurpose food in the refrigerator? I am having a blast doing it!

Thursday, July 7, 2011

Smokin’ Backyard Cookout: Part 1

The smoke has cleared and I’m excited to share my latest cooking adventure!


Over the last two summers I did a fair amount of smoking using my gas grill rigged up with a smoker box and water pans. This year, I tackled smoking in a dedicated smoker! Last November I was lucky enough to win a Masterbuilt electric smoker and I finally put it to work. I know it’s not a traditional smoker that you’d see at a real barbecue place – but for a novice smoker in the ‘burbs it is perfect. The electric smoker maintains a consistent temperature and all it takes is some woodchip additions and monitoring throughout the cooking process.

With inspiration from my previous smoking adventures and my brother’s smoking expertise I put together a menu for a recent get together. When I entertain, I love to try out new recipes, new dishes, and new cooking methods. The challenge of trying something new is exhilarating! There are one or two items that always make an appearance on the table, but most of the dishes are new.

I tackled menu planning and party planning by starting with a list. First with a list of all of the dishes and their ingredients and second a timeline for when each dish would be made. A little cookbook, online research, and a phone call to my brother helped to put the finishing touches on the smoking timeline. The next step was to make labels for each dish for the serving table. This helps plan the table space and also ensures that dishes don’t get forgotten in the rush to get everything on the table.


ON THE MENU
Appetizers
Smoked chicken wings – plain, buffalo, and sweet chili
Chunky pineapple salsa*
Tomatillo-avocado guacamole*
Sea salt & lime tortilla chips*
Want’ems chips with Thai mango dipping sauce
Carrots, broccoli, and celery for dipping (these went untouched)

Main Course
Smoked brisket with coffee dry rub
Smoked chicken with garam masala rub
Homemade garam masala barbecue sauce
Smoked tofu for the vegetarians
Smoked vegetables - summer squash, zucchini, garlic scapes, and mushrooms
Grilled corn on the cob
Tastes Better with Friends’ Peanut Apple Coleslaw

*Old favorite – always on the table for parties

There are too many delicious things to cover in one post, so I’ll start today with the smoked meats and barbecue sauce.


I decided to smoke an assortment of items to test out my new toy. I picked my favorite meat to cook – brisket. Using the temperature required for the brisket, I adjusted the cooking times for the rest of the items. The smoker has different shelves which allowed me to easily add each item at the appropriate time. Everything turned out flavorful, but my hands down favorites were the chicken wings and the chicken breasts. The meat was juicy and the smoky flavor infused each bite.

Smoking Temperature: 225 degrees F
Wood chips: Equal parts Maple and Apple woodchips

Smoked Chicken Wings


2 pounds fresh chicken wings
Smoking time: 1.5 – 2 hours

Seasoning: A generous sprinkling of kosher salt and fresh ground pepper
Prep time: Let seasoned chicken wings refrigerate for an hour or two while the brisket is smoking


Serving styles:
1: Naked – served as is with no sauce
2: Buffalo – I received a free bottle of KC Masterpiece hot buffalo sauce through Foodbuzz. Since I’m not a fan of buffalo flavoring it was a perfect addition to the party. I tossed of the cooked wings in the sauce and every reported that they loved the flavor and spice.
3: Sweet Chili – this sauce, made by the folks behind Want’ems chips is inspired by duck sauce. I was given the sauce to sample. The dip/sauce is full of onion, pepper, garlic, and jalapeno pepper. I tossed wings in a generous helping of sauce. They were sweet, with just a little kick.


Smoked Chicken Breast with Garam Masala Rub


4 whole chicken breasts, bone-in, skin-on
Smoking time: Approximately 2 hours, until the internal temperature reaches 160 degrees

Seasoning: Garam Masala seasoning
My coworkers traveled to India earlier this year and brought back an assortment of spices for me to add to my pantry. I thought this was the perfect opportunity to try them out! Garam masala is a spice blend that is made a little different by each person. It often has cardamom, cinnamon, ginger, coriander, nutmeg, and cloves. Those are all spices that go well with poultry. I rubbed each chicken breast generously with garam masala – making slits in the skin and putting the spices underneath the skin as well. Let the seasoned chicken rest in the refrigerator for an hour or so. Rub the chicken breasts with olive oil before adding to the smoker.

When the internal temperature reaches 160 degrees, remove from the smoker and let rest for 20 minutes before cutting and serving. Serve with barbecue sauce. Eat it on its own or make a messy sandwich.


Smoked Brisket with Coffee Dry Rub


1 - 4.5 pound brisket, fat layer trimmed to about 1/4 inch thick
Smoking time: About 6-7 hours for this size. After 4 hours wrap brisket in foil and continue to smoke for another 2-3 hours. The internal temperature should reach 185 degrees.

Seasoning: Coffee Dry Rub. I first made this seasoning two years ago when I smoked my first ribs. The combination of coffee, brown sugar and chili powder gives the meat a great flavor.

Coffee Dry Rub (courtesy of Whole Foods Fire Up the Grill flyer, summer 2009)
2 cups light brown sugar (I used dark brown, it's all we had)
1 cup chili powder
1/4 cup paprika
1/4 cup kosher salt
1/2 cup medium ground black pepper
1/4 cup finely ground dark roast coffee

Serving: Let the brisket rest for at least 20 minutes before thinly slicing. Serve plain, douse in barbecue sauce or make a sandwich! Reheat the next day in barbecue sauce.

Garam Masala Barbecue Sauce


Barbecue sauce is really easy to make. If you have an extra 20 minutes, it’s well worth whipping up your own unique sauce. I wanted to incorporate the garam masala to pair with the chicken flavoring. I did some internet searching to find a recipe to consult for proportions of ingredients. I happened upon a Barefoot Contessa recipe for a basic barbecue sauce. Using the recipe as a starting place, I created my homemade sauce.

1/2 diced yellow onion
1 garlic scape, minced
1/2 cup vegetable oil
1 6 ounce can tomato paste
1 cup apple cider vinegar
1 cup honey
1/2 cup Worcestershire sauce
1 cup brown mustard
1/2 cup soy sauce
3-4 tablespoons Garam Masala
1 very light sprinkle of hot red chili powder (part of my Indian spice collection)

Heat a large saucepan over medium-low heat
Add vegetable oil, chopped onions and garlic scape and sauté for 10-15 minutes until onions are translucent
Add the remainder of the ingredients and simmer on low for 30 minutes, stirring occasionally
I wanted a smooth sauce, so I used an immersion blender to blend the onions and garlic into the sauce

Makes approximately 1 quart of sauce. Store in an airtight container in the refrigerator if there is any sauce leftover.

Enjoy!


That's all for this post. Stay tuned for the next installment with appetizers and a giveaway!

The Want'ems chips and dips were provided to me as a free sample. I was not obligated to review and I did not receive any financial compensation. I received the KC Masterpiece Buffalo sauce through the FoodBuzz tastemakers program. The sample was also complementary and all thoughts about it are shared voluntarily. The rest of the food I bought at the farmers market and grocery store!

Monday, May 16, 2011

Wine From California, By Way of Social Networking

I love networking – in person or online. I love to meet new people, share stories, and often find out what a small world it is! Online networking and social media let you really see the connections like friends of friends, shared interests, and new opportunities. Over the past year, I’ve connected with many of my twitter and blog friends on LinkedIn. I noticed a few months ago that many of them started joining food related networking groups and thought that it would be a good idea to join too.

Not long after joining the Food Blogger Connection group on LinkedIn I saw a post from Jonathan Boring, Social Media Marketing Manager from the California Wine Club. He was looking for everyday wine drinkers who would be interested in trying out some of their wine selections. The criteria for reviewers were pretty simple; bloggers without expert wine knowledge. That’s me! While I’ve been honing my tasting skills, I do not consider myself an expert in any way. I generally know what I like and have a preference for roses, cabernet francs (or blends with it), and whites on the drier or grassier/citrusy side (very technical description). And after my trip to Spain last year, I’ve been seeking out new and interesting Spanish wines to try.

Back to the California Wine Club - a family business that has been shipping wines since 1990. A quick look at the website will give you a great overview and history of the business. Bruce and Pam Boring select wines to send out as part of their monthly wine club. They have a variety of different memberships – from all California producers to small international wines to aged cabernet. They work with smaller wineries that produce limited quantities. For us here in the Northeast, that might mean wines that aren’t available regularly in our neck of the woods.


I was worried that I wouldn’t be able to participate, due to the restrictions on wine shipping to MA. However the California Wine Club ships by certified freight carrier, so the wine was promptly delivered right to my door. For my first review, I received two bottles from the Robledo Family Winery in the Sonoma/Carneros area of Sonoma. The well packed bottles came with a 12-page booklet describing the wines, the winery and winemakers, recipes, and information about more wine club offerings. This shipment included a 2005 “Los Braceros” Red blend and a 2007 “The Seven Brothers” Lake County Sauvignon Blanc.

This post will cover the red wine, Los Braceros Red Blend. The wine is a blend of equal parts Cabernet Sauvignon, Merlot and Syrah. The tasting notes in the booklet were extensive noting awards, the color, flavors, aromas, weather conditions, aging process, recipes and more. The suggested retail for this wine is $30 and the restaurant price is listed as $45-$50. The wine was bottled in July 2007 and released in September 2008. Only 3000 cases of the wine were produced. I decided to taste the wine alone, and then incorporate into a recipe and enjoy it with the meal.


Using skills I’ve picked up at various wine tasting events, I started first by pouring a glass and observing the color. A nice, deep red (almost a self portrait up there!). Next, I swirled and sniffed. Then a small sip to let it spread over my tongue. Spicy, peppery, and tangy with a little bite. Using a very scientific explanation – it made my tongue tingle and want to take another sip. Not my favorite in terms of red as a sipping wine, but I could see how you would like this wine if you liked a spicy and peppery red. For me, I thought I would like it better with food (and I did). I could imagine it paired with a nice juicy steak right off the grill.

The recipe included in the booklet was a recipe from Maria Robledo for Chiles Rellenos. She picked a bold and spicy dish to pair with the family’s red wine blend. I decided to make a bold red wine tomato sauce and meatballs to pair with the wine. I started by pulling all of the vegetables out of the refrigerator and chopping them into equal sizes for sautéing. In incorporated the wine while sautéing sliced mushrooms. I let the wine come to a bubble and reduce with the mushrooms. The mushroom sauce would have been delicious on its own topping grilled chicken or steak (note for next time!). It had a beautiful color, aroma, and flavor.


I paired the sauce with homemade meatballs over spaghetti and served with toasted bread. The wine gave the sauce a great kick and depth of flavor and paired well as a drink.


I’m excited to open up the Sauvignon Blanc next and share my review. I think it will be a perfect companion to some of my favorite spring dishes.

Don’t forget to check out the California Club website. They have a few different membership options and a lot of fun information about the wineries that they work with. What’s nice about their membership is that you don’t have to commit to a full year – there are no joining fees and you can cancel at anytime. You can also pick all red or all white and pick shipments for monthly, every other month, or quarterly delivery. If you do decide to check them out, make sure to mention that I sent you. You can also keep up with them on their Facebook page.

Los Braceros Hearty Tomato Sauce


1 cup each chopped:
celery
carrots
onions
fresh spinach
mushrooms


Olive oil
3/4 cup Los Braceros red wine blend
2 cans fire roasted diced tomatoes, no salt added
1 can tomato paste
Salt and pepper

Set up a slow cooker or large pot with lid
Pour diced tomatoes and tomato paste into the pot
Assemble chopped celery, carrots and onions together
In a large sauté pan, cook celery, carrots, and onions over medium heat in a little olive oil until softened
Remove from the pan and add to the slow cooker or pot and return skillet to the stove
Add mushrooms to the pan and cook until they start to brown
Add wine, bring to a bubble and then let cook for 3-4 minutes until wine starts to reduce
Pour mushrooms and wine into the slow cooker or pot and return skillet to the stove
Add the spinach to the skillet and wilt
Add wilted spinach to the slow cooker or pot and mix together well
Set the slow cooker to the high 4-hour setting, put the lid on and let cook
I prefer a smoother sauce, so after 4 hours I used my immersion blender to blend the vegetables together


Quick and Easy Meatballs
I made these on a Sunday and had plenty of leftovers for lunches and dinners throughout the week. I served them with pasta, as subs, and just on their own.


Makes 24 tablespoon sized meatballs

2 lbs ground beef
2 eggs
2 tablespoons chopped parsley
1 cup panko breadcrumbs
1/4 cup finely diced onions
Salt and Pepper

Preheat oven to 325 degrees
Line a baking sheet with foil and spray with non-stick spray
In a large bowl, beat the two eggs together
Add ground beef, parsley, and onions and use your hands to combine
Add breadcrumbs, starting with 1/2 cup
Mix together, adding breadcrumbs until the meat is still moist, but holds together well
Using a tablespoon, gently form meatballs and place them on the baking sheet
Bake for 10 minutes, and then flip them over
Bake for 10-15 more minutes until fully cooked through
Serve with sauce and pasta or on a toasted roll with cheese!


Disclosure: I was sent two bottles of wine at no charge from the California Wine Club to review. I was not compensated financially. The opinions are completely mine!

Monday, January 31, 2011

Rocky Mountain Organic Meats with a New England Twist

A quick look at my post archives will reveal that we love beef in the Good Cook Doris kitchen. But with the hubby’s genetically-caused high cholesterol and a desire to incorporate more variety into our meals, we have reduced the amount of red meat we eat at home. When we do buy beef we are conscious about purchasing high-quality meat. Our first preference is from the local vendors at the farmers market. That isn’t always the most convenient, so we look for grass-fed beef and/or local beef at the grocery store.

Last month I received a tweet from @Grassfedorganic that said, “Omnivore?” My reply was, “Yes, most definitely!” @Grassfedorganic is the twitter handle for Rocky Mountain Organic Meats. The CEO, Rod Morrison, generously offered to send me some of their grass-fed meat to try in my kitchen. They have a variety of products from ground meat to beef jerky to deli meats. I told him that I loved brisket, but looked forward to trying any of their beef products. Located in Wyoming, Rocky Mountain Organic Meats offers certified organic grass-fed beef and lamb through their website. According to the Rocky Mountain Organic Meats website:

“Each of our farmers and ranchers, as well as our processing plant has been inspected and certified organic. This means that our livestock have not been given antibiotics, growth hormones, genetically modified organisms or animal by-products and have eaten only organic feed such as certified organic pasture grasses.”

Confinement? What's that?
Photo courtesy of Rocky Mountain Meats.


I’ll add my usual disclosure here. I did not receive any compensation for writing about Rocky Mountain Organic Meats. They generously sent over an assortment of products for me to taste (no obligation to review), and all opinions expressed are my honest opinion. Here’s a look at the assortment:

Beef Jerky, Hot Dogs, Brisket,
Beef Sticks, Ground Brisket, and Beef Pastrami

I love brisket. Smoked, braised, or stewed I will eat it. It’s a cut of meat that lends itself to creativity. Over the summer I smoked the brisket on the backyard grill and enjoyed it with pickled onions. With three feet of snow on the ground and more piling on every other day (that’s what it feels like!), we have to stick with indoor cooking for the time being. Rod sent a 2 pound grass-fed brisket for me to try. When our package first arrived, we opened the Styrofoam cooler and looked under the still-frozen solid ice packs to check out the goods. We put most of the products in the freezer, except for honey pepper beef jerky and the brisket. I can’t remember ever eating beef jerky and the hubby has never really liked jerky of any kind. But this he liked. It was because he felt confident that the ingredients were natural (not like the convenience store jerky). We gnawed on pieces of spicy sweet jerky for a few days for snacks and it was gone pretty quickly.

We also tried the organic beef hotdogs for a quick weeknight dinner with coleslaw and baked beans. The hot dog ingredient list is full of recognizable items: 100% USDA Certified Organic Grass Fed Beef, Water, Organic Black Pepper, Organic White Pepper, Organic Paprika, Organic Ground Mustard, Organic Ground Celery, Organic Granulated Garlic, Sea Salt and Celery Juice Power. I can’t even tell you the last time we ate hot dogs outside of a baseball game or cookout. These were smoky and beefy and if you are craving a hot dog will do the trick.


For the brisket, I wanted to keep it simple to make sure I could taste the flavor of the meat. Rod sent an email describing their meat:

“This beef has never ever seen a feedlot, and does know what corn looks like or taste like. I believe you’re going to taste flavors that you have never had before. Understand that when the cowboys from Texas drove cattle north the cattle got fatter. The high mountain grasses of the Rocky Mountains carry a lot more protein and mineral than always green grasses of the south”.


Using my grandmother’s basic brisket cooking method, I substituted my own flavors for a New England Winter Brisket. I also wanted to make barbecue sauce to top it off. With access to really great locally produced maple products this winter, I’ve been adding maple to a lot of my recipes. For the brisket I used granulated maple sugar, ground roast dark coffee and salt and pepper. While the brisket cooked for a few hours I made a homemade mustard-maple barbecue sauce to top it off. The sauce came out sweet & tangy and was made me think about summer (even with all the snow).


So how did the brisket stack up? The brisket was 2 pounds and had a thin layer of fat on one side. I usually trim off most of the fat, leaving just a few pieces. Grass-fed beef is generally leaner than conventional beef, so it isn’t necessary to trim all the fat away. It will help baste the meat as it cooks. Regular brisket can sometimes shrink in size almost by half after cooking. I weighed the Rocky Mountain brisket before and after cooking for comparison. Since I did trim off some fat, the brisket didn’t shrink very much. It was 1/2 pound lighter after cooking. That meant more to eat! Brisket holds up well to long cooking times, but in general it’s best to cook grass-fed beef for less time than regular beef. Because it is so lean, it will dry out and overcook faster.


New England Maple-Coffee Brisket
This is best prepared the day before you want to serve.

2 pound brisket, some fat trimmed
1/4 cup granulated maple sugar
1/4 cup ground dark roast coffee
1 tablespoon kosher salt (to taste)
1 teaspoon ground black pepper (to taste)
1/4 cup beef broth

Preheat oven to 350 degrees
In a small bowl mix together maple sugar, coffee, salt and pepper
Place brisket on a large piece of foil (large enough to wrap meat in)
Sprinkle 1/2 of the rub on top and massage into meat, turn the brisket over and repeat on the other side
Sprinkle beef broth on top and wrap tightly
Place wrapped meat in a large roasting pan
Roast for 2 hours
Remove the pan from oven and take brisket out of the foil, placing it on a large platter for about 30 minutes
Wrap in new foil and refrigerate
Drain any juices from the original foil and the platter into a container, refrigerate

On Serving Day:
Preheat the oven to 350 degrees
Slice brisket into 1/8 inch slices, being sure to cut against the grain (short fibers = more tender meat)
Place meat into a roasting pan or casserole with either the gravy or barbecue sauce
Cook for 20-30 minutes before serving


Sweet & Tangy Maple BBQ Sauce
Warning: You may want to drink it…


Makes 3-4 cups of sauce, depending on how you measure

2 cups of tomato ketchup
3/4 cup Grade A Dark Amber Maple Syrup (or Grade B)
1/4 cup prepared Dijon mustard
1/4 cup apple cider vinegar
3 tablespoons Worcestershire sauce
2 teaspoons mustard powder

In a large saucepan, heat ketchup over medium-high heat (wear an apron – it bubbles!)
Whisk in the remaining ingredients, bring to a bubble and then lower heat
Simmer for approximately 30 minutes, stirring occasionally

I wrote down the recipe as I went, but I know I tweaked amounts while I cooked. I’m pretty sure I added extra maple and extra mustard powder, but no record of how much. Have fun and tweak it to your liking!

I served the brisket on toasted hot dog rolls with a generous serving of sauce (that's my Sunshine Soup on the side). The sauce is so delicious that I’ve been topping rice, chicken, couscous, really anything I can get my hands on with it. I hope that you enjoy!


For a fun take on barbecue and the taste of summer in winter, head over to my friend’s blog at The Food in My Beard for barbecue soup!

Thank you Rod and Rocky Mountain Organic Meats for sharing your delicious grass-fed beef. To learn more about them, visit their website at http://www.rockymtncuts.com/.

Next on the list to make are burgers using the ground brisket.  What's your favorite beef cut to cook?


Organic Meats Tetonlogo
Photo courtesy of Rocky Mountain Organic Meats

Friday, July 30, 2010

A Manly Steak Salad

We don't do salad very often in our house. I'm not sure why, but it just doesn't make it on the menu. I don't like to eat the same thing every day and most packages of greens are more servings than two people need in a week. But it's summer and it's hot - and light meals are the way to go.

I like salads full of stuff. I'm not a fan of salads that are just lettuce and dressing (like Caesar). I usually order the salads full of beans, avocado, corn, etc.  So when I set out to make a steak salad at home I pulled out a few ingredients from the refrigerator.

For the cold ingredients: Olivia's Organics spinach.  Next up, carrots and English cucumber. The rest of the ingredients (steak, onions, mushroom, and asparagus) went on the grill. For dinner we had, what I'll call a "manly steak salad". For lunch the next day we had the same base salad with grilled chicken on top. It was fantastic both ways.

Mix the salad base early in the week and you can top it with different proteins each day - steak, chicken, chickpeas, tuna (if you like that sort of thing), or even some grilled tofu. You can change the taste with different dressings also. It's easy to tweak the mix and enjoy a different salad every day!


Manly Steak Salad
Serves 2

2 cups spinach leaves, roughly chopped
2 carrots, cut into coins or sticks
1/2 of an English cucumber, cut into one-inch sticks
1 medium Vidalia onion, sliced into rings
1 tablespoon olive oil
1 tablespoon water
8-10 spears asparagus, trimmed
1 portabello mushroom caps, lightly brushed with olive oil
Sirloin Steak, approximately 1 lb.

Wrap onion slices, olive oil, and water in a foil packet and seal tightly

Heat the grill to medium-high heat, grease the grill to prevent sticking
Sprinkle both sides of the steak with a generous amount of kosher salt and freshly ground black pepper
When the grill is hot, add the steak and onions directly over heat
For a 2 inch thick steak, cook for 8 minutes per side for a medium steak
When you flip the steak, flip the onions and move off of the direct heat and
add the mushrooms and asparagus to the grill (flip after 4 minutes)
Remove veggies and steak from the grill and set aside
Do NOT slice the steak yet (it needs to rest)

While the steak is cooking and cooling, prepare the rest of the salad
Place 1 cup of spinach on two serving plates
Split the carrots and cucumber sticks evenly between the two plates

Combine 2 parts olive oil to 1 part balsamic vinegar in a small container with a lid
Shake vigorously to combine

After steak has rested for about 10 minutes (so the juices don't run out), slice and place on top of the salad
Top with sliced portabello, asparagus, and onions
Dress salad to your liking and add freshly ground pepper

Serve with a big fork and knife and enjoy!

Grilled Chicken Topping (for the next day)
1 lb. boneless skinless chicken breasts, excess fat trimmed off
Old Bay seasoning

Rub a generous amount of Old Bay seasoning on both sides of the chicken
Heat grill to medium heat and grease the grill to prevent sticking
When grill is hot, add chicken and cook until done
The time varies depending on the thickness of the chicken and heat of the grill. It could be anywhere from 10-15 minutes
Let the chicken cool before slicing into bite sized pieces
Add to the salad base and dress the salad before eating

Summary
Prep time: 10-15 minutes

Cook time:15-20 minutes
Cutting board, knife, plates, tongs, grill, dressing container, foil, serving dishes and utensils

Monday, May 10, 2010

Slow Braised Beef ... Easy, Flavorful, and Melt in Your Mouth Good

I've got a line up of about five posts, but tonight's dinner was so good I wanted to write it up right away!

A few weeks ago I was a lucky winner of some delicious pesto courtesy of one of my favorite food bloggers, Alicia at The Clean Plate Club Blog. Lauren from Pestos with Panache was nice enough to let me pick my choice of the tasty flavors to try. I've been really into spicy chocolate recently, so I chose the Decadent Dark Chocolate & Ancho Chili Pesto. According to their website:

"Decadent Dark Chocolate & Ancho Chile Pesto marries some of the New World’s flavors—70% dark chocolate, ancho chilies, clove and vanilla—with the Old World’s fresh basil Genovese pesto. Hovering in the background is just a touch of smoky cumin to form a truly complex flavor."

I wanted to make something interesting with the pesto and had been tossing ideas around for a week or two. I had decided to make a roast beef this weekend to use for lunches during the week. When I got home from the store with my chuck roast, I went to my cookbook shelf for inspiration. I found a recipe for a slow-braised lamb (or goat!) Jalisco-style in my Mexican Everyday (Rick Bayless) cookbook. What I love about this cookbook are the riffs that follow each recipe. Following this recipe was a riff called Northern Mexican Barbacoa - using a beef chuck roast and potatoes. I had bought a yucca, so I swapped that in for the potatoes.


This was the easiest roast I've ever made - thanks to using the pesto in place of the marinade. When the roast was done, it was so tender it just melted in your mouth. The yucca held up to the long slow braise and the leftover juice made a great sauce. Delicious!! This is getting added to the favorite recipe/cooking method list.

Good Cook Doris' Riff on Rick Bayless' Riff on Slow Braised Lamb (or Goat) Jalisco-Style
1 3-3.5 pound beef chuck roast, tied
2 tablespoons Decadent Dark Chocolate & Ancho Chili Pesto, thawed
1-3 medium yucca, peeled and sliced into 1 inch rounds
1 tablespoon kosher salt
Enough water to cover the yucca and about a quarter of the roast
An extra tablespoon of pesto for the sauce

I used my 5-quart slow cooker for this.

Cover the bottom of the slow cooker with the slice yucca
Sprinkle the salt over the yucca
Massage the pesto into the roast - making sure to cover all sides evenly
Place the roast on top of the yucca
Pour in enough water to cover the yucca and about a quarter of the roast
Turn on the slow cooker to the High - Six Hour setting
Go about your day!


The hubby is very proud of this aerial photo.

When the roast is done, take out very carefully (mine practically fell apart) and remove the string
Remove the yucca and put into a bowl
Carefully ladle out (or pour) liquid into a dish
I made my roast in advance, so I let it cool and then put in the fridge for tonight


To prepare the juice
Scrape off any fat that has gelled on the top of the juice
Pour the leftover liquid into a sauce pan and add the additional tablespoon of pesto
Bring to a boil
Cook for 10-15 minutes, until the juice has reduced and concentrated


Reheat the meat and yucca with some juice in a 350 degree oven for 10 minutes
Serve, ladling more juice on top


Thursday, February 11, 2010

Grass-Fed Beef Chili

One of the benefits of going to the farmers' market is being able to purchase locally raised meats. Not only do you support your local farmers, you also know how the meat was raised. I haven't seen Food Inc. yet, but a friend recently did and gave me his take on how he is changing his meat consumption patterns as a result. In addition to reducing the amount of red meat in his diet, he decided to stop eating beef unless it is grass-fed and hopes that everyone else follows suit (in time). The challenge in doing that is the availability of products to meet the demand. Hopefully we'll move toward a change in the beef industry to increase the supply and availability.

Have you seen Food Inc.? Have you changed your eating habits as a result of the movie or to be more environmentally concious? I'd love to hear about it - please leave a comment!

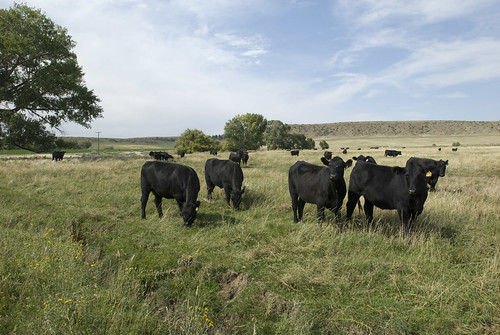
During our last trip to the market, we picked up some grass-fed ground beef from Springdell Farms. Visit their website to read about how they treat their Black Angus cattle. It comes through in the texture and taste of the meat. A good tip that they gave us for cooking was to make sure not to overcook the beef. The beef we bought that day was extra lean (and grass-fed beef can be overcooked easily).

Veggie chili is a frequent menu item at our house. With the meat in the fridge, I decided to make a beef chili for a hearty meal for the New England February climate. We had this for Super Bowl Sunday topped with guacamole and fresh grated Colby-jack cheese. I chopped up the usual suspects - jalapeno, red bell pepper, and yellow onion and then got to work!


For the liquid, I used some leftover chunky veggie tomato sauce we had in the refrigerator. I also used the spices in my spice rack - dried cilantro, ground cumin, and chili powder. You can use any color beans you have in the pantry and throw in any other veggies you might have on hand. It's a great meal to use up any ingredients leftover from other meals.


Instead of the quick 20-minute chili that I usually make, this is a slow-cooking chili that simmered for 2-3 hours before the big game. The addition of cornmeal creates a rich (a little 'creamy'), flavorful, and satisfying result! The leftovers made tasty lunches throughout the next week.

Game Day Grass-Fed Beef Chili
Makes about 6 servings
1 pound ground beef
2 garlic cloves, minced
1 jalapeno, seeded and finely diced
1 red bell pepper, seeded and finely diced
1-2 medium yellow onions, diced
1 can kidney beans, drained
1 can pinto beans, drained
1/2 a jar tomato sauce
1 tablespoon chili powder
1/2 tablespoon ground cumin
1/2 tablespoon dried cilantro
Salt and Pepper
2 tablespoons cornmeal
Olive oil
Shredded Colby-jack cheese and guacamole to top it off

Heat a medium stock-pot over medium-high heat (a 6 on my range)
Add a small amount of oil to the pan
Add beef, garlic, onions, jalapeno, and pepper and cook until just browned, stirring the beef and breaking it up as it cooks
Drain and excess fat from the pan and return to the heat
Add in beans, sauce, spices, and salt and pepper, stir
Reduce heat to low, cover and simmer for 2+ hours, stirring occasionally
Top with cheese and guacamole and serve with cornbread or tortilla chips

Haiku from the Hubby:
Grass fed and so lean
Chili with spice and on top
Mmmmm Guacamole

LinkWithin

Related Posts with Thumbnails